25 ChatGPT Prompts for Bloggers That Save Hours of Writing Time
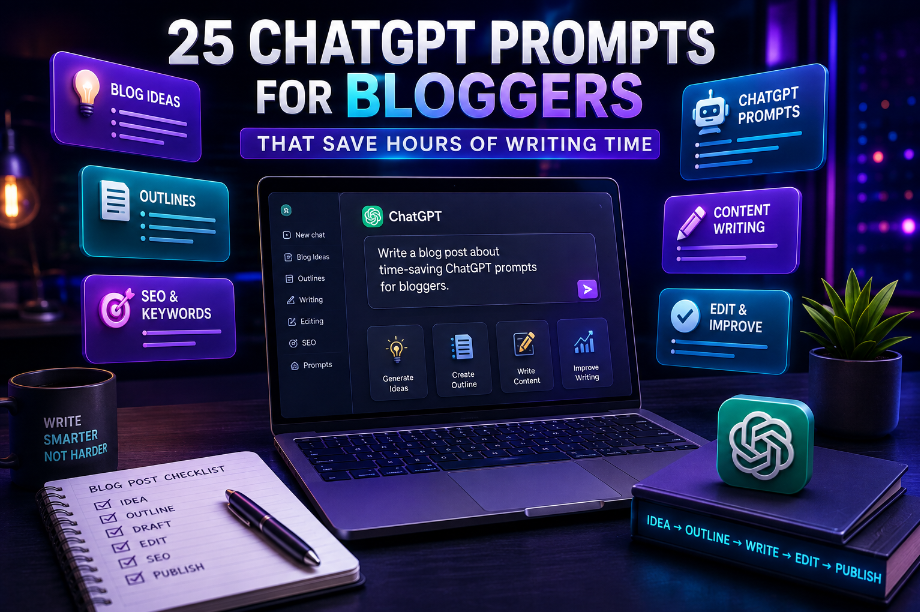
25 ChatGPT Prompts for Bloggers That Save Hours of Writing Time
Focus Keyword: ChatGPT prompts for bloggers
Meta Title: 25 ChatGPT Prompts for Bloggers That Save Hours
Meta Description: Discover 25 ChatGPT prompts for bloggers to find ideas, create outlines, improve drafts, and save hours on your blogging workflow.
Suggested URL Slug: /chatgpt-prompts-for-bloggers/

Writing a blog post looks easy until you actually sit down to write one.
You may have a good idea in your head, but then come the questions: What should the title be? Where should I start? What headings should I use? Did I cover everything the reader needs?
I’ve found that one of the hardest parts of blogging is not actually writing the words. It’s getting your thoughts organized before you write them.
That’s where ChatGPT prompts for bloggers can be genuinely useful.
But there is an important difference between using ChatGPT as a writing assistant and asking it to write everything for you.
Instead of saying, “Write a 2,000-word article about AI,” you can use separate prompts to find ideas, build an outline, create examples, review your writing, and spot gaps.
That gives you much more control over the final article.
In this guide, you’ll find 25 practical prompts you can use throughout your blogging workflow—from finding your next topic to checking an article before publishing.
Why Good Prompts Matter for Bloggers
A vague prompt usually gives you a vague answer.
For example:
“Give me blog ideas about AI.”
That’s not wrong, but it doesn’t tell ChatGPT who you’re writing for or what kind of ideas you need.
Now compare it with:
“Give me 15 beginner-friendly blog ideas about AI tools for small business owners in the United States. Focus on practical problems and avoid broad topics.”
The second prompt gives the AI a much clearer job.
OpenAI’s current guidance recommends making prompts clear and specific, providing enough context, and refining the prompt after reviewing the response.
A simple formula
A useful prompt often contains:
Task + Context + Audience + Format + Goal
You don’t need complicated prompt engineering.
You simply need to tell ChatGPT what you want and give it enough information to do the job properly.

What I Learned About Using ChatGPT for Blogging
There is one mistake that’s very easy to make when you first start using AI for content.
You give ChatGPT a huge instruction such as:
“Write me a 2,000-word SEO article about AI tools.”
The result may look impressive at first.
But when you read it carefully, something can feel missing.
The article may be grammatically correct, yet the examples are generic. Some sections repeat the same idea. Sometimes it answers the topic without really solving the reader’s problem.
That’s why I prefer a different approach.
Instead of asking ChatGPT to be the entire writer, use it as a collection of smaller assistants.
One prompt can help with ideas.
Another can help with your outline.
Another can review your draft.
Another can find missing information.
And another can help you create a stronger conclusion.
This approach gives you much more control over the final piece.
The goal isn’t to replace your thinking. It’s to spend less time on repetitive work so you have more time for the thinking that actually matters.
25 ChatGPT Prompts for Bloggers
Before using these prompts, replace anything inside [brackets] with your own information.
You don’t need to use all 25.
Pick the ones that solve the problem you’re facing right now.
1. Find New Blog Post Ideas
Give me 20 blog post ideas about [TOPIC] for [TARGET AUDIENCE].
Focus on practical problems readers are likely to have.
Avoid generic and repetitive topics.
For each idea, provide:
– Blog title
– Search intent
– Main problem solved
– Suggested content angle
Best for: Building a content calendar.
Instead of publishing whatever topic comes to mind, this prompt helps you think about what your readers actually need.
2. Find Long-Tail Topic Ideas
Give me 25 specific long-tail blog topics related to [MAIN TOPIC].
Target beginners in the United States.
Focus on specific questions and problems rather than broad subjects.
For each topic, explain what the reader is trying to accomplish.
Long-tail topics can be useful when you want to create content around specific questions rather than trying to cover an entire subject in one article.
3. Turn One Idea Into Multiple Articles
I want to write about [TOPIC].
Create 10 related blog post ideas that cover different search intents.
Include:
– Informational
– How-to
– Comparison
– Listicle
– Problem-solving
– Beginner guide
Make sure the topics are meaningfully different.
One good topic can often become several useful articles.
The key is making each article answer a different question instead of publishing five versions of the same post.
4. Create Better Blog Titles
Create 15 SEO-friendly titles for this topic:
[TOPIC]
My target audience is [AUDIENCE].
Make the titles clear, useful, and interesting without using misleading clickbait.
Keep the main keyword natural.
A good title should tell readers what they will get without making promises the article can’t keep.
Google’s Search guidance recommends descriptive and useful page titles, while also emphasizing people-first content over content written mainly to manipulate rankings.
5. Create a Complete Blog Outline
Create a detailed outline for a blog post titled:
[TITLE]
Focus keyword: [KEYWORD]
Target audience: [AUDIENCE]
Create:
– Introduction
– H2 sections
– H3 subsections
– Examples
– Practical tips
– FAQ
– Conclusion
Make sure every section adds something useful.
Avoid repetition.
Don’t Let the Outline Become the Article
An AI-generated outline can look impressive.
But an outline is only a map.
Your own examples, observations, screenshots, comparisons, and explanations are what make the finished article useful.
When you get an outline, look at each heading and ask yourself:
“What can I add here that another generic article probably won’t?”
Maybe it’s a mistake you’ve seen.
Maybe it’s a simpler explanation.
Maybe it’s something you tested yourself.
Those small details can make a big difference.

6. Write a Strong Introduction
Write an engaging introduction for this blog post:
[TITLE]
Focus keyword: [KEYWORD]
Start with a relatable problem.
Use the focus keyword naturally within the first 100 words.
Keep the introduction under 150 words.
Use a friendly, conversational tone.
Avoid exaggerated claims.
The introduction should quickly answer one question in the reader’s mind:
“Why should I keep reading?”
7. Explain a Difficult Topic Simply
Explain [TOPIC] to a complete beginner.
Use simple English and short paragraphs.
Avoid technical jargon unless you explain it first.
Give one everyday example and one practical example.
Write as if you are explaining it to a smart friend.
This works particularly well for technical subjects.
If your reader has to search for another article just to understand your explanation, the section probably needs to be simpler.
8. Create Useful H2 Headings
Create 10 useful H2 headings for an article about:
[TOPIC]
Focus keyword: [KEYWORD]
The headings should answer real reader questions
and create a logical flow.
Do not force the keyword into every heading.
That last instruction is important.
You don’t need your main keyword in every heading.
Headings should help readers navigate the article, not look like a list of search terms.
9. Turn Notes Into a Blog Section
Turn the following notes into a clear blog section:
[PASTE NOTES]
Keep the original meaning.
Add useful context where needed.
Use short paragraphs and natural transitions.
Do not invent facts that are not supported by the notes.
This is one of my favorite ways to use AI in the writing process.
Your ideas remain at the center, while AI helps turn rough notes into something easier to read.
10. Add Realistic Examples
Give me 5 realistic examples that could help explain:
[CONCEPT]
My readers are [AUDIENCE].
Make each example practical and easy to understand.
Avoid fictional statistics or unsupported claims.
Examples can turn an abstract explanation into something readers can actually use.
For example, instead of simply explaining what a prompt is, show the difference between a vague prompt and a specific one.
11. Create a Step-by-Step Tutorial
Create a beginner-friendly step-by-step guide for:
[PROCESS]
Include:
1. What the reader needs first
2. Step-by-step instructions
3. Common mistakes
4. Beginner tips
5. Expected result
Keep each step short and actionable.
Readers often don’t just want to know what something is.
They want to know how to do it.
That’s why step-by-step content can make a simple article much more useful.
12. Find Common Mistakes
List 10 common mistakes beginners make when [TASK].
For each mistake, explain:
– Why it happens
– Why it matters
– How to avoid it
This is a simple way to add practical value instead of filling an article with general information.
A “what not to do” section can sometimes be more helpful than another list of basic tips.
13. Create a Comparison Table
Compare [OPTION A] and [OPTION B] for beginners.
Create a simple table covering:
– Price
– Ease of use
– Best use
– Key features
– Limitations
– Best for
After the table, explain which option is better
for different types of users.
Do not invent information that needs verification.
For current prices, features, or product information, verify the details using official sources before publishing.
This is especially important for software because features and pricing can change.
14. Improve a Weak Paragraph
Improve this paragraph:
[PASTE PARAGRAPH]
Keep the original meaning.
Make it clearer, more natural, and easier to read.
Use simple English.
Remove unnecessary words.
Do not add unsupported claims.
A Small Editing Trick That Makes a Big Difference
When an AI-generated paragraph feels too formal, don’t always ask for another complete rewrite.
First, look for three things:
- Is the sentence saying something obvious?
- Does the paragraph repeat an earlier point?
- Would I actually say this when explaining the idea to another blogger?
For example:
Too formal:
“Utilizing AI-powered solutions can significantly enhance the efficiency of your content production workflow.”
More natural:
“AI tools can help you create content faster.”
The second sentence isn’t trying to sound clever.
That’s exactly why it’s easier to read.
Good blogging isn’t about using impressive words. It’s about helping the reader understand the idea quickly.
15. Make Your Writing More Natural
Rewrite the following section in a natural, friendly voice:
[TEXT]
Keep the information accurate.
Use varied sentence lengths.
Remove repetitive phrases and unnecessary filler.
Avoid corporate or robotic language.
Do not change the facts.
Don’t use this prompt to make your writing sound artificially casual.
Use it to remove stiffness and make the message easier to understand.

16. Create a FAQ Section
Create 8 frequently asked questions about:
[TOPIC]
Write short, helpful answers for beginners.
Only include questions that are genuinely relevant.
Avoid repeating information already covered.
A useful FAQ should answer questions readers actually have.
Don’t add questions just to make the article longer.
17. Find Missing Information
Review this blog outline:
[PASTE OUTLINE]
What important questions or information might a beginner still need?
List the gaps and suggest where each missing point should be added.
Do not rewrite the entire outline.
This turns ChatGPT into more of a reviewer than a writer.
And sometimes that’s where it becomes most useful.
Instead of asking, “What else can you write?”, you’re asking, “What did I forget?”
That’s a much better question.
18. Create a Strong Conclusion
Write a strong conclusion for:
[TITLE]
Summarize the main lessons without repeating the entire article.
End with one practical action the reader can take today.
Keep it under 120 words.
A conclusion doesn’t need to introduce another big idea.
Its job is to bring the article together and give the reader a clear next step.
19. Create a Meta Description
Write 5 SEO-friendly meta descriptions for:
[TITLE]
Focus keyword: [KEYWORD]
Keep each description concise and natural.
Focus on the benefit to the reader.
Do not use clickbait.
Google explains that meta descriptions can help summarize a page for search users, although Google may sometimes generate the search snippet from the page content instead. Google Search Central: Snippets
20. Create Image Ideas
Suggest 5 original image ideas for this blog post:
[TITLE]
For each image provide:
– Image concept
– Where it should appear
– Short image prompt
– Suggested alt text
Make the visuals directly relevant to the content.
For this article, a visual showing an AI writing workspace, prompt cards, blog outlines, and content ideas would fit much better than an unrelated technology image.
Relevant visuals can also make a long article easier to scan.
21. Create Social Media Posts
Turn this blog post into:
– 3 Facebook posts
– 3 LinkedIn posts
– 5 Instagram captions
– 5 short X posts
Keep each platform’s style different.
Create curiosity without misleading the reader.
Include a natural call to read the full article.
The important part is not simply copying the blog introduction into every social post.
Each platform should give people a reason to stop scrolling.
22. Repurpose One Blog Post
Turn this blog post into a content package:
[PASTE ARTICLE]
Create:
– 1 email newsletter
– 5 social posts
– 5 short video ideas
– 10 quote-style posts
– 5 Pinterest titles
Keep every piece connected to the original article.
One useful article can become several pieces of content without starting from a blank page every time.
But don’t simply copy and paste the same paragraph everywhere.
Adapt the idea to each format.
23. Find Internal Linking Opportunities
Here is my blog post:
[PASTE ARTICLE]
Here are my existing related articles:
[PASTE TITLES]
Suggest 5 natural internal linking opportunities.
For each one provide:
– Anchor text
– Sentence where the link should appear
– Related article title
– Reason the link helps the reader
Do not force links where they don’t fit naturally.
For a site like WDTECK, this can help connect related articles across AI Tools, Guides, Comparisons, Alternatives, and Prompts.
The important word is natural.
Don’t add a link simply because you have a keyword to use. Add it when the reader would genuinely benefit from clicking it.
24. Fact-Check Before Publishing
Review the following article for claims that may need fact-checking:
[PASTE ARTICLE]
Create three sections:
1. Claims that appear straightforward
2. Claims that should be verified
3. Claims that may be misleading or unsupported
Do not assume uncertain information is true.
For anything time-sensitive, recommend checking
an authoritative source.
This step matters especially when writing about software features, prices, statistics, AI updates, or current events.
AI can produce a confident answer that still needs verification.
So before publishing a claim that could change—or that matters to the reader—check the original source.
25. Use This Final Blog Editor Prompt
Act as a careful blog editor.
Review this article:
[PASTE ARTICLE]
Check:
– Accuracy
– Clarity
– Reader usefulness
– Search intent
– Logical structure
– Repetition
– Grammar
– Awkward wording
– Unsupported claims
– Keyword overuse
– Weak sections
– Missing beginner questions
– Internal linking opportunities
– Conclusion and CTA
Do not rewrite the entire article.
Instead, give me:
1. What is already strong
2. What needs improvement
3. Specific sentences that should be changed
4. Important information that is missing
5. A final publish-readiness score out of 10
This is a useful final step because it asks the AI to find problems rather than simply generate more words.
The Better Way to Use AI for Blogging
The biggest mistake is thinking you need one giant prompt to create an entire article.
You don’t.
A better workflow is:
Research → Ideas → Title → Outline → Draft → Examples → Edit → Fact-check → Publish
Use AI where it saves time, but keep your judgment involved at every stage.
OpenAI recommends clear instructions, useful context, and an iterative approach where you review the response and refine your prompt.
Google’s current guidance also emphasizes original, useful, people-first content rather than creating pages mainly to manipulate search rankings.
That means the best workflow isn’t:
AI → Publish
It’s:
You → AI assistance → You → Edit → Verify → Publish
That extra human step matters.
A Simple 5-Step Blogging Workflow
Step 1: Find the topic
Use Prompt #1 or #2.
Look for a real reader problem rather than simply chasing a keyword.
Step 2: Build the structure
Use Prompt #4 and #5.
Choose a title and create a clear outline.
Step 3: Write section by section
Use the prompts for explanations, examples, tutorials, and common mistakes.
Don’t force AI to generate the whole article in one response.
Step 4: Improve the draft
Use Prompt #14, #17, #23, and #24.
This is where you add your own experience and remove weak or repetitive sections.
Step 5: Final review
Use Prompt #25 before publishing.
Then read the article yourself.
If something sounds unnatural, change it.

Don’t Let AI Replace Your Voice
Here’s the part I think bloggers should remember most.
If ChatGPT chooses your topic, writes every paragraph, creates every example, and produces your conclusion, you can end up with an article that is technically complete but feels like hundreds of other articles online.
Your experience is what makes your content different.
If you’ve tested something, explain what you learned.
If a method didn’t work as expected, say so.
If a tool is useful for beginners but not advanced users, explain why.
Those small details can be more valuable than another 500 words.
Readers don’t need more words. They need better answers.
Google’s current guidance specifically encourages content that demonstrates first-hand experience and provides original value beyond what can easily be reproduced elsewhere.
So don’t be afraid to add your own perspective.
That’s often the part that makes a useful article memorable.
Final Thoughts
The best ChatGPT prompts for bloggers aren’t necessarily the longest or most complicated ones.
They’re the prompts that help you get unstuck.
When you don’t know what to write, use one for ideas.
When your thoughts are messy, use one for an outline.
When a section feels weak, ask for an editorial review.
When you’re finished, use a fact-checking and editing prompt before publishing.
But don’t hand over the entire writing process.
Bring your own examples, observations, opinions, and lessons into the article.
Think of ChatGPT as a helpful assistant sitting beside you—not the person sitting in your chair.
Once you build a small collection of prompts that actually fit your workflow, you can spend less time staring at a blank screen and more time creating content that people genuinely want to read.
Ready to try them?
Pick three prompts from this guide and use them on your next article.
Don’t try all 25 at once.
Start small. Keep the prompts that genuinely save you time and remove the ones that don’t.
Your goal isn’t to publish more AI-generated words.
Your goal is to create better content with less wasted time.
Frequently Asked Questions
Can ChatGPT write an entire blog post for me?
Yes, ChatGPT can help draft an entire article, but that doesn’t mean you should publish the first draft without reviewing it.
A better approach is to use AI for brainstorming, outlining, drafting, editing, and finding gaps while you remain responsible for the final article.
What makes a good prompt for blogging?
A good prompt clearly explains the task, gives enough context, identifies the audience, and describes the desired result.
Specific instructions usually give you more useful results than very short, vague requests.
Can I use these prompts for any blog niche?
Yes. You can adapt the prompts for technology, finance, travel, lifestyle, food, education, business, or almost any other niche.
Simply replace the topic, audience, and goal.
Should I use the focus keyword in every heading?
No.
Your keyword should appear naturally where it makes sense. Forcing the same phrase into every heading can make the article harder to read.
Write for the reader first.
Should I fact-check ChatGPT’s answers?
Yes.
Especially check statistics, prices, product features, current events, dates, and other information that may change.
For important claims, use reliable primary or authoritative sources.
Can AI-generated content rank on Google?
Google’s guidance focuses on the quality and helpfulness of content rather than simply whether AI was involved in its creation. However, using AI to mass-produce low-value pages primarily to manipulate search rankings can violate Google’s spam policies.
How many prompts should I use for one article?
There is no magic number.
For a simple post, three or four prompts may be enough. For a detailed article, you might use prompts for research, outlining, examples, editing, fact-checking, and final review.
Use only what actually improves the article.
Focus Keyword: ChatGPT prompts for bloggers
Meta Title: 25 ChatGPT Prompts for Bloggers That Save Hours
Meta Description: Discover 25 ChatGPT prompts for bloggers to find ideas, create outlines, improve drafts, and save hours on your blogging workflow.
Suggested URL Slug: /chatgpt-prompts-for-bloggers/
Writing a blog post looks easy until you actually sit down to write one.
You may have a good idea in your head, but then come the questions: What should the title be? Where should I start? What headings should I use? Did I cover everything the reader needs?
I’ve found that one of the hardest parts of blogging is not actually writing the words. It’s getting your thoughts organized before you write them.
That’s where ChatGPT prompts for bloggers can be genuinely useful.
But there is an important difference between using ChatGPT as a writing assistant and asking it to write everything for you.
Instead of saying, “Write a 2,000-word article about AI,” you can use separate prompts to find ideas, build an outline, create examples, review your writing, and spot gaps.
That gives you much more control over the final article.
In this guide, you’ll find 25 practical prompts you can use throughout your blogging workflow—from finding your next topic to checking an article before publishing.
Why Good Prompts Matter for Bloggers
A vague prompt usually gives you a vague answer.
For example:
“Give me blog ideas about AI.”
That’s not wrong, but it doesn’t tell ChatGPT who you’re writing for or what kind of ideas you need.
Now compare it with:
“Give me 15 beginner-friendly blog ideas about AI tools for small business owners in the United States. Focus on practical problems and avoid broad topics.”
The second prompt gives the AI a much clearer job.
OpenAI’s current guidance recommends making prompts clear and specific, providing enough context, and refining the prompt after reviewing the response.
A simple formula
A useful prompt often contains:
Task + Context + Audience + Format + Goal
You don’t need complicated prompt engineering.
You simply need to tell ChatGPT what you want and give it enough information to do the job properly.
What I Learned About Using ChatGPT for Blogging
There is one mistake that’s very easy to make when you first start using AI for content.
You give ChatGPT a huge instruction such as:
“Write me a 2,000-word SEO article about AI tools.”
The result may look impressive at first.
But when you read it carefully, something can feel missing.
The article may be grammatically correct, yet the examples are generic. Some sections repeat the same idea. Sometimes it answers the topic without really solving the reader’s problem.
That’s why I prefer a different approach.
Instead of asking ChatGPT to be the entire writer, use it as a collection of smaller assistants.
One prompt can help with ideas.
Another can help with your outline.
Another can review your draft.
Another can find missing information.
And another can help you create a stronger conclusion.
This approach gives you much more control over the final piece.
The goal isn’t to replace your thinking. It’s to spend less time on repetitive work so you have more time for the thinking that actually matters.
25 ChatGPT Prompts for Bloggers
Before using these prompts, replace anything inside [brackets] with your own information.
You don’t need to use all 25.
Pick the ones that solve the problem you’re facing right now.
1. Find New Blog Post Ideas
Give me 20 blog post ideas about [TOPIC] for [TARGET AUDIENCE].
Focus on practical problems readers are likely to have.
Avoid generic and repetitive topics.
For each idea, provide:
– Blog title
– Search intent
– Main problem solved
– Suggested content angle
Best for: Building a content calendar.
Instead of publishing whatever topic comes to mind, this prompt helps you think about what your readers actually need.
2. Find Long-Tail Topic Ideas
Give me 25 specific long-tail blog topics related to [MAIN TOPIC].
Target beginners in the United States.
Focus on specific questions and problems rather than broad subjects.
For each topic, explain what the reader is trying to accomplish.
Long-tail topics can be useful when you want to create content around specific questions rather than trying to cover an entire subject in one article.
3. Turn One Idea Into Multiple Articles
I want to write about [TOPIC].
Create 10 related blog post ideas that cover different search intents.
Include:
– Informational
– How-to
– Comparison
– Listicle
– Problem-solving
– Beginner guide
Make sure the topics are meaningfully different.
One good topic can often become several useful articles.
The key is making each article answer a different question instead of publishing five versions of the same post.
4. Create Better Blog Titles
Create 15 SEO-friendly titles for this topic:
[TOPIC]
My target audience is [AUDIENCE].
Make the titles clear, useful, and interesting without using misleading clickbait.
Keep the main keyword natural.
A good title should tell readers what they will get without making promises the article can’t keep.
Google’s Search guidance recommends descriptive and useful page titles, while also emphasizing people-first content over content written mainly to manipulate rankings.
5. Create a Complete Blog Outline
Create a detailed outline for a blog post titled:
[TITLE]
Focus keyword: [KEYWORD]
Target audience: [AUDIENCE]
Create:
– Introduction
– H2 sections
– H3 subsections
– Examples
– Practical tips
– FAQ
– Conclusion
Make sure every section adds something useful.
Avoid repetition.
Don’t Let the Outline Become the Article
An AI-generated outline can look impressive.
But an outline is only a map.
Your own examples, observations, screenshots, comparisons, and explanations are what make the finished article useful.
When you get an outline, look at each heading and ask yourself:
“What can I add here that another generic article probably won’t?”
Maybe it’s a mistake you’ve seen.
Maybe it’s a simpler explanation.
Maybe it’s something you tested yourself.
Those small details can make a big difference.
6. Write a Strong Introduction
Write an engaging introduction for this blog post:
[TITLE]
Focus keyword: [KEYWORD]
Start with a relatable problem.
Use the focus keyword naturally within the first 100 words.
Keep the introduction under 150 words.
Use a friendly, conversational tone.
Avoid exaggerated claims.
The introduction should quickly answer one question in the reader’s mind:
“Why should I keep reading?”
7. Explain a Difficult Topic Simply
Explain [TOPIC] to a complete beginner.
Use simple English and short paragraphs.
Avoid technical jargon unless you explain it first.
Give one everyday example and one practical example.
Write as if you are explaining it to a smart friend.
This works particularly well for technical subjects.
If your reader has to search for another article just to understand your explanation, the section probably needs to be simpler.
8. Create Useful H2 Headings
Create 10 useful H2 headings for an article about:
[TOPIC]
Focus keyword: [KEYWORD]
The headings should answer real reader questions
and create a logical flow.
Do not force the keyword into every heading.
That last instruction is important.
You don’t need your main keyword in every heading.
Headings should help readers navigate the article, not look like a list of search terms.
9. Turn Notes Into a Blog Section
Turn the following notes into a clear blog section:
[PASTE NOTES]
Keep the original meaning.
Add useful context where needed.
Use short paragraphs and natural transitions.
Do not invent facts that are not supported by the notes.
This is one of my favorite ways to use AI in the writing process.
Your ideas remain at the center, while AI helps turn rough notes into something easier to read.
10. Add Realistic Examples
Give me 5 realistic examples that could help explain:
[CONCEPT]
My readers are [AUDIENCE].
Make each example practical and easy to understand.
Avoid fictional statistics or unsupported claims.
Examples can turn an abstract explanation into something readers can actually use.
For example, instead of simply explaining what a prompt is, show the difference between a vague prompt and a specific one.
11. Create a Step-by-Step Tutorial
Create a beginner-friendly step-by-step guide for:
[PROCESS]
Include:
1. What the reader needs first
2. Step-by-step instructions
3. Common mistakes
4. Beginner tips
5. Expected result
Keep each step short and actionable.
Readers often don’t just want to know what something is.
They want to know how to do it.
That’s why step-by-step content can make a simple article much more useful.
12. Find Common Mistakes
List 10 common mistakes beginners make when [TASK].
For each mistake, explain:
– Why it happens
– Why it matters
– How to avoid it
This is a simple way to add practical value instead of filling an article with general information.
A “what not to do” section can sometimes be more helpful than another list of basic tips.
13. Create a Comparison Table
Compare [OPTION A] and [OPTION B] for beginners.
Create a simple table covering:
– Price
– Ease of use
– Best use
– Key features
– Limitations
– Best for
After the table, explain which option is better
for different types of users.
Do not invent information that needs verification.
For current prices, features, or product information, verify the details using official sources before publishing.
This is especially important for software because features and pricing can change.
14. Improve a Weak Paragraph
Improve this paragraph:
[PASTE PARAGRAPH]
Keep the original meaning.
Make it clearer, more natural, and easier to read.
Use simple English.
Remove unnecessary words.
Do not add unsupported claims.
A Small Editing Trick That Makes a Big Difference
When an AI-generated paragraph feels too formal, don’t always ask for another complete rewrite.
First, look for three things:
- Is the sentence saying something obvious?
- Does the paragraph repeat an earlier point?
- Would I actually say this when explaining the idea to another blogger?
For example:
Too formal:
“Utilizing AI-powered solutions can significantly enhance the efficiency of your content production workflow.”
More natural:
“AI tools can help you create content faster.”
The second sentence isn’t trying to sound clever.
That’s exactly why it’s easier to read.
Good blogging isn’t about using impressive words. It’s about helping the reader understand the idea quickly.
15. Make Your Writing More Natural
Rewrite the following section in a natural, friendly voice:
[TEXT]
Keep the information accurate.
Use varied sentence lengths.
Remove repetitive phrases and unnecessary filler.
Avoid corporate or robotic language.
Do not change the facts.
Don’t use this prompt to make your writing sound artificially casual.
Use it to remove stiffness and make the message easier to understand.
16. Create a FAQ Section
Create 8 frequently asked questions about:
[TOPIC]
Write short, helpful answers for beginners.
Only include questions that are genuinely relevant.
Avoid repeating information already covered.
A useful FAQ should answer questions readers actually have.
Don’t add questions just to make the article longer.
17. Find Missing Information
Review this blog outline:
[PASTE OUTLINE]
What important questions or information might a beginner still need?
List the gaps and suggest where each missing point should be added.
Do not rewrite the entire outline.
This turns ChatGPT into more of a reviewer than a writer.
And sometimes that’s where it becomes most useful.
Instead of asking, “What else can you write?”, you’re asking, “What did I forget?”
That’s a much better question.
18. Create a Strong Conclusion
Write a strong conclusion for:
[TITLE]
Summarize the main lessons without repeating the entire article.
End with one practical action the reader can take today.
Keep it under 120 words.
A conclusion doesn’t need to introduce another big idea.
Its job is to bring the article together and give the reader a clear next step.
19. Create a Meta Description
Write 5 SEO-friendly meta descriptions for:
[TITLE]
Focus keyword: [KEYWORD]
Keep each description concise and natural.
Focus on the benefit to the reader.
Do not use clickbait.
Google explains that meta descriptions can help summarize a page for search users, although Google may sometimes generate the search snippet from the page content instead. Google Search Central: Snippets
20. Create Image Ideas
Suggest 5 original image ideas for this blog post:
[TITLE]
For each image provide:
– Image concept
– Where it should appear
– Short image prompt
– Suggested alt text
Make the visuals directly relevant to the content.
For this article, a visual showing an AI writing workspace, prompt cards, blog outlines, and content ideas would fit much better than an unrelated technology image.
Relevant visuals can also make a long article easier to scan.
21. Create Social Media Posts
Turn this blog post into:
– 3 Facebook posts
– 3 LinkedIn posts
– 5 Instagram captions
– 5 short X posts
Keep each platform’s style different.
Create curiosity without misleading the reader.
Include a natural call to read the full article.
The important part is not simply copying the blog introduction into every social post.
Each platform should give people a reason to stop scrolling.
22. Repurpose One Blog Post
Turn this blog post into a content package:
[PASTE ARTICLE]
Create:
– 1 email newsletter
– 5 social posts
– 5 short video ideas
– 10 quote-style posts
– 5 Pinterest titles
Keep every piece connected to the original article.
One useful article can become several pieces of content without starting from a blank page every time.
But don’t simply copy and paste the same paragraph everywhere.
Adapt the idea to each format.
23. Find Internal Linking Opportunities
Here is my blog post:
[PASTE ARTICLE]
Here are my existing related articles:
[PASTE TITLES]
Suggest 5 natural internal linking opportunities.
For each one provide:
– Anchor text
– Sentence where the link should appear
– Related article title
– Reason the link helps the reader
Do not force links where they don’t fit naturally.
For a site like WDTECK, this can help connect related articles across AI Tools, Guides, Comparisons, Alternatives, and Prompts.
The important word is natural.
Don’t add a link simply because you have a keyword to use. Add it when the reader would genuinely benefit from clicking it.
24. Fact-Check Before Publishing
Review the following article for claims that may need fact-checking:
[PASTE ARTICLE]
Create three sections:
1. Claims that appear straightforward
2. Claims that should be verified
3. Claims that may be misleading or unsupported
Do not assume uncertain information is true.
For anything time-sensitive, recommend checking
an authoritative source.
This step matters especially when writing about software features, prices, statistics, AI updates, or current events.
AI can produce a confident answer that still needs verification.
So before publishing a claim that could change—or that matters to the reader—check the original source.
25. Use This Final Blog Editor Prompt
Act as a careful blog editor.
Review this article:
[PASTE ARTICLE]
Check:
– Accuracy
– Clarity
– Reader usefulness
– Search intent
– Logical structure
– Repetition
– Grammar
– Awkward wording
– Unsupported claims
– Keyword overuse
– Weak sections
– Missing beginner questions
– Internal linking opportunities
– Conclusion and CTA
Do not rewrite the entire article.
Instead, give me:
1. What is already strong
2. What needs improvement
3. Specific sentences that should be changed
4. Important information that is missing
5. A final publish-readiness score out of 10
This is a useful final step because it asks the AI to find problems rather than simply generate more words.
The Better Way to Use AI for Blogging
The biggest mistake is thinking you need one giant prompt to create an entire article.
You don’t.
A better workflow is:
Research → Ideas → Title → Outline → Draft → Examples → Edit → Fact-check → Publish
Use AI where it saves time, but keep your judgment involved at every stage.
OpenAI recommends clear instructions, useful context, and an iterative approach where you review the response and refine your prompt.
Google’s current guidance also emphasizes original, useful, people-first content rather than creating pages mainly to manipulate search rankings.
That means the best workflow isn’t:
AI → Publish
It’s:
You → AI assistance → You → Edit → Verify → Publish
That extra human step matters.
A Simple 5-Step Blogging Workflow
Step 1: Find the topic
Use Prompt #1 or #2.
Look for a real reader problem rather than simply chasing a keyword.
Step 2: Build the structure
Use Prompt #4 and #5.
Choose a title and create a clear outline.
Step 3: Write section by section
Use the prompts for explanations, examples, tutorials, and common mistakes.
Don’t force AI to generate the whole article in one response.
Step 4: Improve the draft
Use Prompt #14, #17, #23, and #24.
This is where you add your own experience and remove weak or repetitive sections.
Step 5: Final review
Use Prompt #25 before publishing.
Then read the article yourself.
If something sounds unnatural, change it.
Don’t Let AI Replace Your Voice
Here’s the part I think bloggers should remember most.
If ChatGPT chooses your topic, writes every paragraph, creates every example, and produces your conclusion, you can end up with an article that is technically complete but feels like hundreds of other articles online.
Your experience is what makes your content different.
If you’ve tested something, explain what you learned.
If a method didn’t work as expected, say so.
If a tool is useful for beginners but not advanced users, explain why.
Those small details can be more valuable than another 500 words.
Readers don’t need more words. They need better answers.
Google’s current guidance specifically encourages content that demonstrates first-hand experience and provides original value beyond what can easily be reproduced elsewhere.
So don’t be afraid to add your own perspective.
That’s often the part that makes a useful article memorable.
Final Thoughts
The best ChatGPT prompts for bloggers aren’t necessarily the longest or most complicated ones.
They’re the prompts that help you get unstuck.
When you don’t know what to write, use one for ideas.
When your thoughts are messy, use one for an outline.
When a section feels weak, ask for an editorial review.
When you’re finished, use a fact-checking and editing prompt before publishing.
But don’t hand over the entire writing process.
Bring your own examples, observations, opinions, and lessons into the article.
Think of ChatGPT as a helpful assistant sitting beside you—not the person sitting in your chair.
Once you build a small collection of prompts that actually fit your workflow, you can spend less time staring at a blank screen and more time creating content that people genuinely want to read.
Ready to try them?
Pick three prompts from this guide and use them on your next article.
Don’t try all 25 at once.
Start small. Keep the prompts that genuinely save you time and remove the ones that don’t.
Your goal isn’t to publish more AI-generated words.
Your goal is to create better content with less wasted time.
Frequently Asked Questions
Can ChatGPT write an entire blog post for me?
Yes, ChatGPT can help draft an entire article, but that doesn’t mean you should publish the first draft without reviewing it.
A better approach is to use AI for brainstorming, outlining, drafting, editing, and finding gaps while you remain responsible for the final article.
What makes a good prompt for blogging?
A good prompt clearly explains the task, gives enough context, identifies the audience, and describes the desired result.
Specific instructions usually give you more useful results than very short, vague requests.
Can I use these prompts for any blog niche?
Yes. You can adapt the prompts for technology, finance, travel, lifestyle, food, education, business, or almost any other niche.
Simply replace the topic, audience, and goal.
Should I use the focus keyword in every heading?
No.
Your keyword should appear naturally where it makes sense. Forcing the same phrase into every heading can make the article harder to read.
Write for the reader first.
Should I fact-check ChatGPT’s answers?
Yes.
Especially check statistics, prices, product features, current events, dates, and other information that may change.
For important claims, use reliable primary or authoritative sources.
Can AI-generated content rank on Google?
Google’s guidance focuses on the quality and helpfulness of content rather than simply whether AI was involved in its creation. However, using AI to mass-produce low-value pages primarily to manipulate search rankings can violate Google’s spam policies.
How many prompts should I use for one article?
There is no magic number.
For a simple post, three or four prompts may be enough. For a detailed article, you might use prompts for research, outlining, examples, editing, fact-checking, and final review.
Use only what actually improves the article.
25 ChatGPT Prompts for Bloggers That Save Hours of Writing Time
Focus Keyword: ChatGPT prompts for bloggers
Meta Title: 25 ChatGPT Prompts for Bloggers That Save Hours
Meta Description: Discover 25 ChatGPT prompts for bloggers to find ideas, create outlines, improve drafts, and save hours on your blogging workflow.
Suggested URL Slug: /chatgpt-prompts-for-bloggers/
Writing a blog post looks easy until you actually sit down to write one.
You may have a good idea in your head, but then come the questions: What should the title be? Where should I start? What headings should I use? Did I cover everything the reader needs?
I’ve found that one of the hardest parts of blogging is not actually writing the words. It’s getting your thoughts organized before you write them.
That’s where ChatGPT prompts for bloggers can be genuinely useful.
But there is an important difference between using ChatGPT as a writing assistant and asking it to write everything for you.
Instead of saying, “Write a 2,000-word article about AI,” you can use separate prompts to find ideas, build an outline, create examples, review your writing, and spot gaps.
That gives you much more control over the final article.
In this guide, you’ll find 25 practical prompts you can use throughout your blogging workflow—from finding your next topic to checking an article before publishing.
Why Good Prompts Matter for Bloggers
A vague prompt usually gives you a vague answer.
For example:
“Give me blog ideas about AI.”
That’s not wrong, but it doesn’t tell ChatGPT who you’re writing for or what kind of ideas you need.
Now compare it with:
“Give me 15 beginner-friendly blog ideas about AI tools for small business owners in the United States. Focus on practical problems and avoid broad topics.”
The second prompt gives the AI a much clearer job.
OpenAI’s current guidance recommends making prompts clear and specific, providing enough context, and refining the prompt after reviewing the response.
A simple formula
A useful prompt often contains:
Task + Context + Audience + Format + Goal
You don’t need complicated prompt engineering.
You simply need to tell ChatGPT what you want and give it enough information to do the job properly.
What I Learned About Using ChatGPT for Blogging
There is one mistake that’s very easy to make when you first start using AI for content.
You give ChatGPT a huge instruction such as:
“Write me a 2,000-word SEO article about AI tools.”
The result may look impressive at first.
But when you read it carefully, something can feel missing.
The article may be grammatically correct, yet the examples are generic. Some sections repeat the same idea. Sometimes it answers the topic without really solving the reader’s problem.
That’s why I prefer a different approach.
Instead of asking ChatGPT to be the entire writer, use it as a collection of smaller assistants.
One prompt can help with ideas.
Another can help with your outline.
Another can review your draft.
Another can find missing information.
And another can help you create a stronger conclusion.
This approach gives you much more control over the final piece.
The goal isn’t to replace your thinking. It’s to spend less time on repetitive work so you have more time for the thinking that actually matters.
25 ChatGPT Prompts for Bloggers
Before using these prompts, replace anything inside [brackets] with your own information.
You don’t need to use all 25.
Pick the ones that solve the problem you’re facing right now.
1. Find New Blog Post Ideas
Give me 20 blog post ideas about [TOPIC] for [TARGET AUDIENCE].
Focus on practical problems readers are likely to have.
Avoid generic and repetitive topics.
For each idea, provide:
– Blog title
– Search intent
– Main problem solved
– Suggested content angle
Best for: Building a content calendar.
Instead of publishing whatever topic comes to mind, this prompt helps you think about what your readers actually need.
2. Find Long-Tail Topic Ideas
Give me 25 specific long-tail blog topics related to [MAIN TOPIC].
Target beginners in the United States.
Focus on specific questions and problems rather than broad subjects.
For each topic, explain what the reader is trying to accomplish.
Long-tail topics can be useful when you want to create content around specific questions rather than trying to cover an entire subject in one article.
3. Turn One Idea Into Multiple Articles
I want to write about [TOPIC].
Create 10 related blog post ideas that cover different search intents.
Include:
– Informational
– How-to
– Comparison
– Listicle
– Problem-solving
– Beginner guide
Make sure the topics are meaningfully different.
One good topic can often become several useful articles.
The key is making each article answer a different question instead of publishing five versions of the same post.
4. Create Better Blog Titles
Create 15 SEO-friendly titles for this topic:
[TOPIC]
My target audience is [AUDIENCE].
Make the titles clear, useful, and interesting without using misleading clickbait.
Keep the main keyword natural.
A good title should tell readers what they will get without making promises the article can’t keep.
Google’s Search guidance recommends descriptive and useful page titles, while also emphasizing people-first content over content written mainly to manipulate rankings.
5. Create a Complete Blog Outline
Create a detailed outline for a blog post titled:
[TITLE]
Focus keyword: [KEYWORD]
Target audience: [AUDIENCE]
Create:
– Introduction
– H2 sections
– H3 subsections
– Examples
– Practical tips
– FAQ
– Conclusion
Make sure every section adds something useful.
Avoid repetition.
Don’t Let the Outline Become the Article
An AI-generated outline can look impressive.
But an outline is only a map.
Your own examples, observations, screenshots, comparisons, and explanations are what make the finished article useful.
When you get an outline, look at each heading and ask yourself:
“What can I add here that another generic article probably won’t?”
Maybe it’s a mistake you’ve seen.
Maybe it’s a simpler explanation.
Maybe it’s something you tested yourself.
Those small details can make a big difference.
6. Write a Strong Introduction
Write an engaging introduction for this blog post:
[TITLE]
Focus keyword: [KEYWORD]
Start with a relatable problem.
Use the focus keyword naturally within the first 100 words.
Keep the introduction under 150 words.
Use a friendly, conversational tone.
Avoid exaggerated claims.
The introduction should quickly answer one question in the reader’s mind:
“Why should I keep reading?”
7. Explain a Difficult Topic Simply
Explain [TOPIC] to a complete beginner.
Use simple English and short paragraphs.
Avoid technical jargon unless you explain it first.
Give one everyday example and one practical example.
Write as if you are explaining it to a smart friend.
This works particularly well for technical subjects.
If your reader has to search for another article just to understand your explanation, the section probably needs to be simpler.
8. Create Useful H2 Headings
Create 10 useful H2 headings for an article about:
[TOPIC]
Focus keyword: [KEYWORD]
The headings should answer real reader questions
and create a logical flow.
Do not force the keyword into every heading.
That last instruction is important.
You don’t need your main keyword in every heading.
Headings should help readers navigate the article, not look like a list of search terms.
9. Turn Notes Into a Blog Section
Turn the following notes into a clear blog section:
[PASTE NOTES]
Keep the original meaning.
Add useful context where needed.
Use short paragraphs and natural transitions.
Do not invent facts that are not supported by the notes.
This is one of my favorite ways to use AI in the writing process.
Your ideas remain at the center, while AI helps turn rough notes into something easier to read.
10. Add Realistic Examples
Give me 5 realistic examples that could help explain:
[CONCEPT]
My readers are [AUDIENCE].
Make each example practical and easy to understand.
Avoid fictional statistics or unsupported claims.
Examples can turn an abstract explanation into something readers can actually use.
For example, instead of simply explaining what a prompt is, show the difference between a vague prompt and a specific one.
11. Create a Step-by-Step Tutorial
Create a beginner-friendly step-by-step guide for:
[PROCESS]
Include:
1. What the reader needs first
2. Step-by-step instructions
3. Common mistakes
4. Beginner tips
5. Expected result
Keep each step short and actionable.
Readers often don’t just want to know what something is.
They want to know how to do it.
That’s why step-by-step content can make a simple article much more useful.
12. Find Common Mistakes
List 10 common mistakes beginners make when [TASK].
For each mistake, explain:
– Why it happens
– Why it matters
– How to avoid it
This is a simple way to add practical value instead of filling an article with general information.
A “what not to do” section can sometimes be more helpful than another list of basic tips.
13. Create a Comparison Table
Compare [OPTION A] and [OPTION B] for beginners.
Create a simple table covering:
– Price
– Ease of use
– Best use
– Key features
– Limitations
– Best for
After the table, explain which option is better
for different types of users.
Do not invent information that needs verification.
For current prices, features, or product information, verify the details using official sources before publishing.
This is especially important for software because features and pricing can change.
14. Improve a Weak Paragraph
Improve this paragraph:
[PASTE PARAGRAPH]
Keep the original meaning.
Make it clearer, more natural, and easier to read.
Use simple English.
Remove unnecessary words.
Do not add unsupported claims.
A Small Editing Trick That Makes a Big Difference
When an AI-generated paragraph feels too formal, don’t always ask for another complete rewrite.
First, look for three things:
- Is the sentence saying something obvious?
- Does the paragraph repeat an earlier point?
- Would I actually say this when explaining the idea to another blogger?
For example:
Too formal:
“Utilizing AI-powered solutions can significantly enhance the efficiency of your content production workflow.”
More natural:
“AI tools can help you create content faster.”
The second sentence isn’t trying to sound clever.
That’s exactly why it’s easier to read.
Good blogging isn’t about using impressive words. It’s about helping the reader understand the idea quickly.
15. Make Your Writing More Natural
Rewrite the following section in a natural, friendly voice:
[TEXT]
Keep the information accurate.
Use varied sentence lengths.
Remove repetitive phrases and unnecessary filler.
Avoid corporate or robotic language.
Do not change the facts.
Don’t use this prompt to make your writing sound artificially casual.
Use it to remove stiffness and make the message easier to understand.
16. Create a FAQ Section
Create 8 frequently asked questions about:
[TOPIC]
Write short, helpful answers for beginners.
Only include questions that are genuinely relevant.
Avoid repeating information already covered.
A useful FAQ should answer questions readers actually have.
Don’t add questions just to make the article longer.
17. Find Missing Information
Review this blog outline:
[PASTE OUTLINE]
What important questions or information might a beginner still need?
List the gaps and suggest where each missing point should be added.
Do not rewrite the entire outline.
This turns ChatGPT into more of a reviewer than a writer.
And sometimes that’s where it becomes most useful.
Instead of asking, “What else can you write?”, you’re asking, “What did I forget?”
That’s a much better question.
18. Create a Strong Conclusion
Write a strong conclusion for:
[TITLE]
Summarize the main lessons without repeating the entire article.
End with one practical action the reader can take today.
Keep it under 120 words.
A conclusion doesn’t need to introduce another big idea.
Its job is to bring the article together and give the reader a clear next step.
19. Create a Meta Description
Write 5 SEO-friendly meta descriptions for:
[TITLE]
Focus keyword: [KEYWORD]
Keep each description concise and natural.
Focus on the benefit to the reader.
Do not use clickbait.
Google explains that meta descriptions can help summarize a page for search users, although Google may sometimes generate the search snippet from the page content instead. Google Search Central: Snippets
20. Create Image Ideas
Suggest 5 original image ideas for this blog post:
[TITLE]
For each image provide:
– Image concept
– Where it should appear
– Short image prompt
– Suggested alt text
Make the visuals directly relevant to the content.
For this article, a visual showing an AI writing workspace, prompt cards, blog outlines, and content ideas would fit much better than an unrelated technology image.
Relevant visuals can also make a long article easier to scan.
21. Create Social Media Posts
Turn this blog post into:
– 3 Facebook posts
– 3 LinkedIn posts
– 5 Instagram captions
– 5 short X posts
Keep each platform’s style different.
Create curiosity without misleading the reader.
Include a natural call to read the full article.
The important part is not simply copying the blog introduction into every social post.
Each platform should give people a reason to stop scrolling.
22. Repurpose One Blog Post
Turn this blog post into a content package:
[PASTE ARTICLE]
Create:
– 1 email newsletter
– 5 social posts
– 5 short video ideas
– 10 quote-style posts
– 5 Pinterest titles
Keep every piece connected to the original article.
One useful article can become several pieces of content without starting from a blank page every time.
But don’t simply copy and paste the same paragraph everywhere.
Adapt the idea to each format.
23. Find Internal Linking Opportunities
Here is my blog post:
[PASTE ARTICLE]
Here are my existing related articles:
[PASTE TITLES]
Suggest 5 natural internal linking opportunities.
For each one provide:
– Anchor text
– Sentence where the link should appear
– Related article title
– Reason the link helps the reader
Do not force links where they don’t fit naturally.
For a site like WDTECK, this can help connect related articles across AI Tools, Guides, Comparisons, Alternatives, and Prompts.
The important word is natural.
Don’t add a link simply because you have a keyword to use. Add it when the reader would genuinely benefit from clicking it.
24. Fact-Check Before Publishing
Review the following article for claims that may need fact-checking:
[PASTE ARTICLE]
Create three sections:
1. Claims that appear straightforward
2. Claims that should be verified
3. Claims that may be misleading or unsupported
Do not assume uncertain information is true.
For anything time-sensitive, recommend checking
an authoritative source.
This step matters especially when writing about software features, prices, statistics, AI updates, or current events.
AI can produce a confident answer that still needs verification.
So before publishing a claim that could change—or that matters to the reader—check the original source.
25. Use This Final Blog Editor Prompt
Act as a careful blog editor.
Review this article:
[PASTE ARTICLE]
Check:
– Accuracy
– Clarity
– Reader usefulness
– Search intent
– Logical structure
– Repetition
– Grammar
– Awkward wording
– Unsupported claims
– Keyword overuse
– Weak sections
– Missing beginner questions
– Internal linking opportunities
– Conclusion and CTA
Do not rewrite the entire article.
Instead, give me:
1. What is already strong
2. What needs improvement
3. Specific sentences that should be changed
4. Important information that is missing
5. A final publish-readiness score out of 10
This is a useful final step because it asks the AI to find problems rather than simply generate more words.
The Better Way to Use AI for Blogging
The biggest mistake is thinking you need one giant prompt to create an entire article.
You don’t.
A better workflow is:
Research → Ideas → Title → Outline → Draft → Examples → Edit → Fact-check → Publish
Use AI where it saves time, but keep your judgment involved at every stage.
OpenAI recommends clear instructions, useful context, and an iterative approach where you review the response and refine your prompt.
Google’s current guidance also emphasizes original, useful, people-first content rather than creating pages mainly to manipulate search rankings.
That means the best workflow isn’t:
AI → Publish
It’s:
You → AI assistance → You → Edit → Verify → Publish
That extra human step matters.
A Simple 5-Step Blogging Workflow
Step 1: Find the topic
Use Prompt #1 or #2.
Look for a real reader problem rather than simply chasing a keyword.
Step 2: Build the structure
Use Prompt #4 and #5.
Choose a title and create a clear outline.
Step 3: Write section by section
Use the prompts for explanations, examples, tutorials, and common mistakes.
Don’t force AI to generate the whole article in one response.
Step 4: Improve the draft
Use Prompt #14, #17, #23, and #24.
This is where you add your own experience and remove weak or repetitive sections.
Step 5: Final review
Use Prompt #25 before publishing.
Then read the article yourself.
If something sounds unnatural, change it.
Don’t Let AI Replace Your Voice
Here’s the part I think bloggers should remember most.
If ChatGPT chooses your topic, writes every paragraph, creates every example, and produces your conclusion, you can end up with an article that is technically complete but feels like hundreds of other articles online.
Your experience is what makes your content different.
If you’ve tested something, explain what you learned.
If a method didn’t work as expected, say so.
If a tool is useful for beginners but not advanced users, explain why.
Those small details can be more valuable than another 500 words.
Readers don’t need more words. They need better answers.
Google’s current guidance specifically encourages content that demonstrates first-hand experience and provides original value beyond what can easily be reproduced elsewhere.
So don’t be afraid to add your own perspective.
That’s often the part that makes a useful article memorable.
Final Thoughts
The best ChatGPT prompts for bloggers aren’t necessarily the longest or most complicated ones.
They’re the prompts that help you get unstuck.
When you don’t know what to write, use one for ideas.
When your thoughts are messy, use one for an outline.
When a section feels weak, ask for an editorial review.
When you’re finished, use a fact-checking and editing prompt before publishing.
But don’t hand over the entire writing process.
Bring your own examples, observations, opinions, and lessons into the article.
Think of ChatGPT as a helpful assistant sitting beside you—not the person sitting in your chair.
Once you build a small collection of prompts that actually fit your workflow, you can spend less time staring at a blank screen and more time creating content that people genuinely want to read.
Ready to try them?
Pick three prompts from this guide and use them on your next article.
Don’t try all 25 at once.
Start small. Keep the prompts that genuinely save you time and remove the ones that don’t.
Your goal isn’t to publish more AI-generated words.
Your goal is to create better content with less wasted time.
Frequently Asked Questions
Can ChatGPT write an entire blog post for me?
Yes, ChatGPT can help draft an entire article, but that doesn’t mean you should publish the first draft without reviewing it.
A better approach is to use AI for brainstorming, outlining, drafting, editing, and finding gaps while you remain responsible for the final article.
What makes a good prompt for blogging?
A good prompt clearly explains the task, gives enough context, identifies the audience, and describes the desired result.
Specific instructions usually give you more useful results than very short, vague requests.
Can I use these prompts for any blog niche?
Yes. You can adapt the prompts for technology, finance, travel, lifestyle, food, education, business, or almost any other niche.
Simply replace the topic, audience, and goal.
Should I use the focus keyword in every heading?
No.
Your keyword should appear naturally where it makes sense. Forcing the same phrase into every heading can make the article harder to read.
Write for the reader first.
Should I fact-check ChatGPT’s answers?
Yes.
Especially check statistics, prices, product features, current events, dates, and other information that may change.
For important claims, use reliable primary or authoritative sources.
Can AI-generated content rank on Google?
Google’s guidance focuses on the quality and helpfulness of content rather than simply whether AI was involved in its creation. However, using AI to mass-produce low-value pages primarily to manipulate search rankings can violate Google’s spam policies.
How many prompts should I use for one article?
There is no magic number.
For a simple post, three or four prompts may be enough. For a detailed article, you might use prompts for research, outlining, examples, editing, fact-checking, and final review.
Use only what actually improves the article.